Virtualbox
This page shows how to install and configure VirtualBox on Mac.
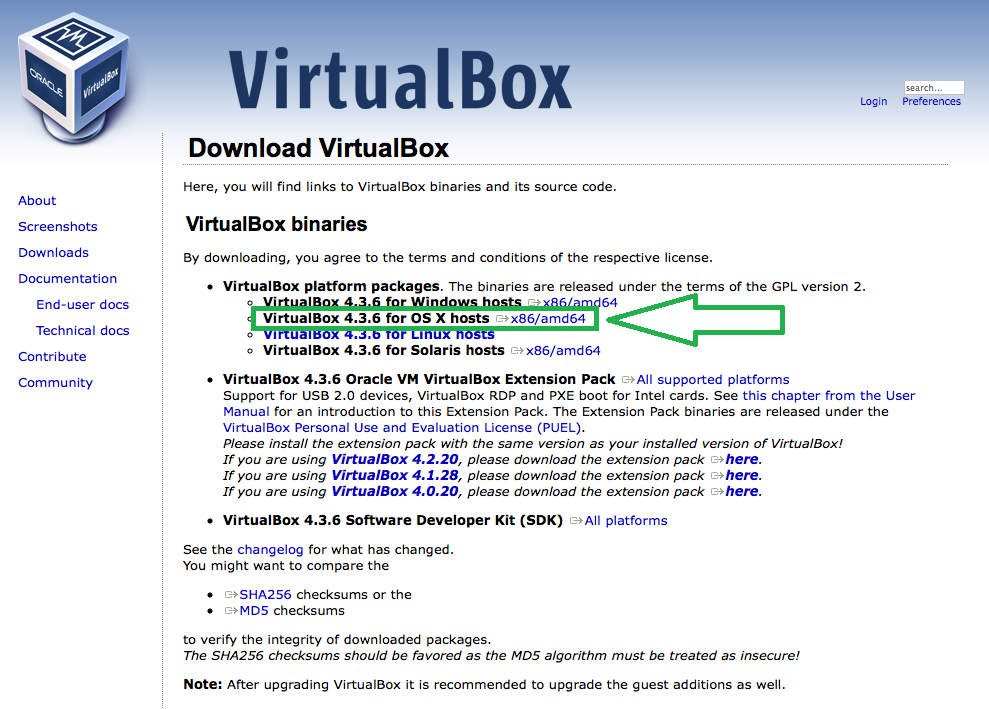
1. First, you access to the http://www.virtualbox.org/
2. Then click download link at the left menu panel. Then click the x86/amd64 link at the VirtualBox for OS X hosts
3. Run the downloaded "VirtualBox-4.3.6-91406-OSX.dmg". You should see below windows. Then double click "VirtualBox.pkg" and start installing.
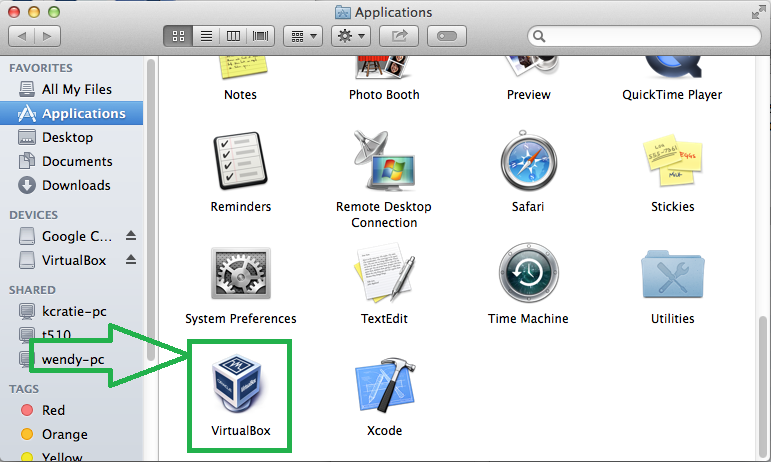
4. Now you see the VirtualBox icon in application. Double click the icon and start the VirtualBox.
5. Put the VirtualBox at forefront in desktop screen and select "reference" in VirtualBox menu bar.
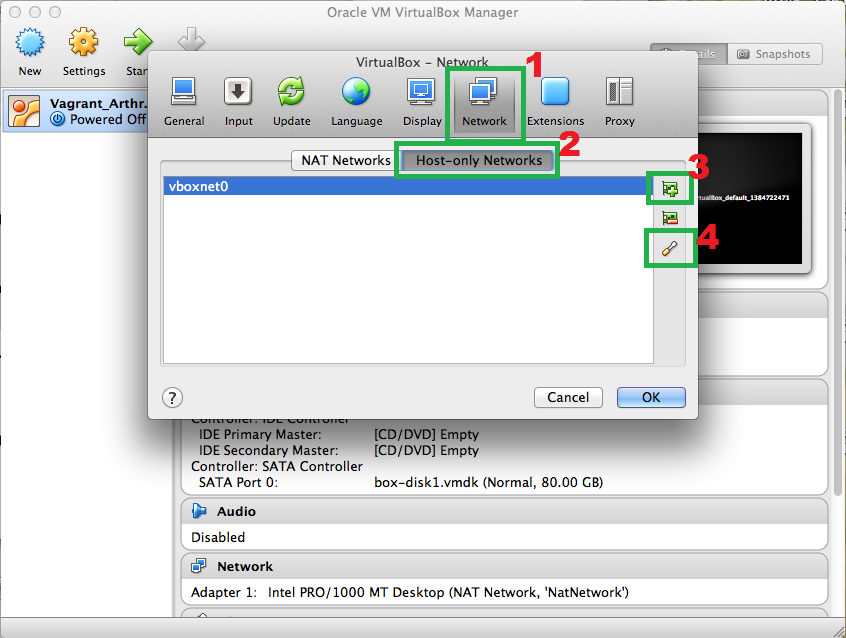
6. Now you select the "Network"(1) then select "Host-only Network". And click plus sign icon(3). Then "vboxnet0" or similar is added in the list. After than, you click driver-looking icon(4).
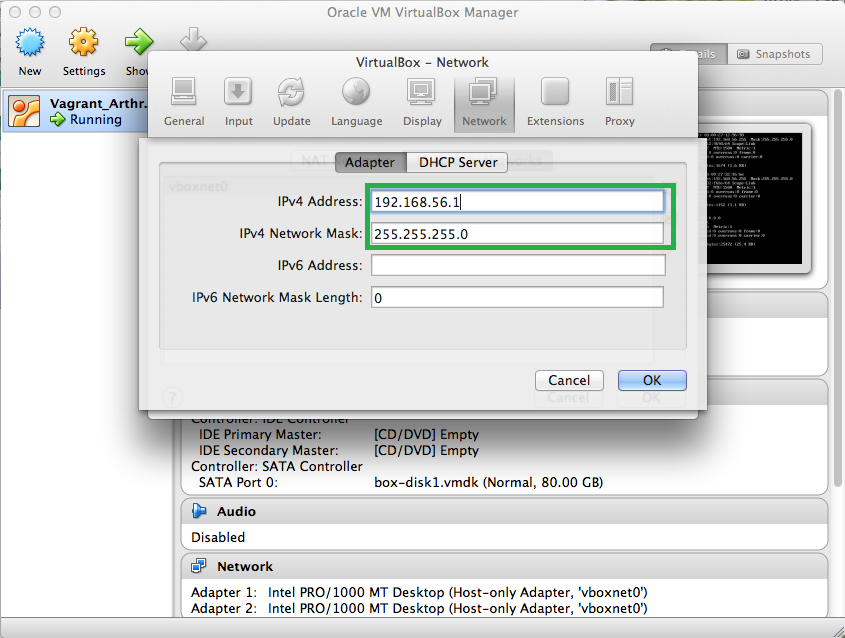
7. Now you check the "IPv4 Address" and "IPv4 Network Netmask". You don't need to change anything in this step. Then select "DHCP Server" tap.
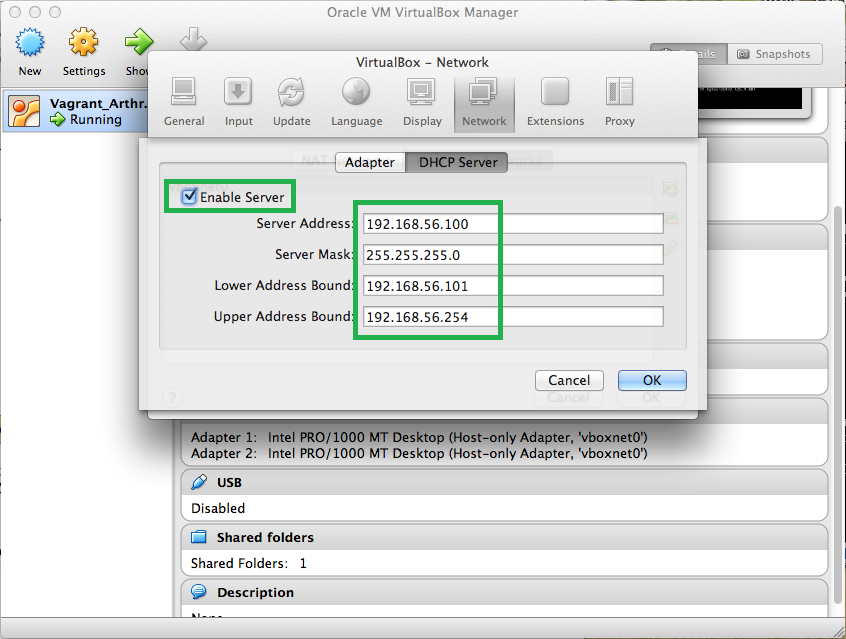
8. At first, the "DHCP Server" is unchecked and every other fields are blank. Now you check the radio button and fill up the field as below. The first three address range should match with the first three address range in "IPv4 Address" of "Adapter" tab.

