Specify Appliance: Difference between revisions
Kyuhojeong (talk | contribs) |
Kyuhojeong (talk | contribs) No edit summary |
||
| (15 intermediate revisions by the same user not shown) | |||
| Line 2: | Line 2: | ||
[[Category:Appliance]] | [[Category:Appliance]] | ||
[[Category:Specify]] | [[Category:Specify]] | ||
==Specify Appliance== | |||
Specify is a software application for managing museum specimen collection. It is a powerful application that depends on software such as database management systems, so its first-time installation and uses can take time and effort. The iDigBio Specify Appliance helps reduce this burden by packaging Specify and all its required software in the form of a pre-configured, plug-and-play virtual appliance. The Specify Appliance runs as a virtual machine in your desktop, laptop or server, using freely available virtualization software (VirtualBox, or VMware). In its typical usage, a user installs the virtualization software, downloads the virtual appliance, unpacks it, and starts it up - then, the whole Specify software is available conveniently through a Web interface and/or a remote display client (VNC). "Under the hood", the virtual appliance is running Linux, Java, Specify, a Web server (Apache), and a database server (MySQL), and more - but the user does not need to worry about configuring and running any of this software - instead, just connecting to the Specify graphical user interface. The appliance supports both the Specify thin client (Web-based, with less features) and the full-featured thick client (through remote display). The steps below guide you through the process of installing and running the Specify appliance for the first time. | |||
Specify appliance contains below software. | |||
===Packaged software=== | |||
- MySQL | |||
- Java Runtime Environment | |||
- Specify 6.5 | |||
- Specify Thin Client | |||
- VNCServer | |||
- GNOME | |||
- Configuration Console | |||
==1. Install hypervisor== | ==1. Install hypervisor== | ||
| Line 21: | Line 39: | ||
for VirtualBox | for VirtualBox | ||
- | |||
- http://www.acis.ufl.edu/~xetron/Downloads/Specify_Appliance_v2.2_virtualbox.zip | |||
==3. Specify appliance usage instruction== | ==3. Specify appliance usage instruction== | ||
===Running specify appliance=== | |||
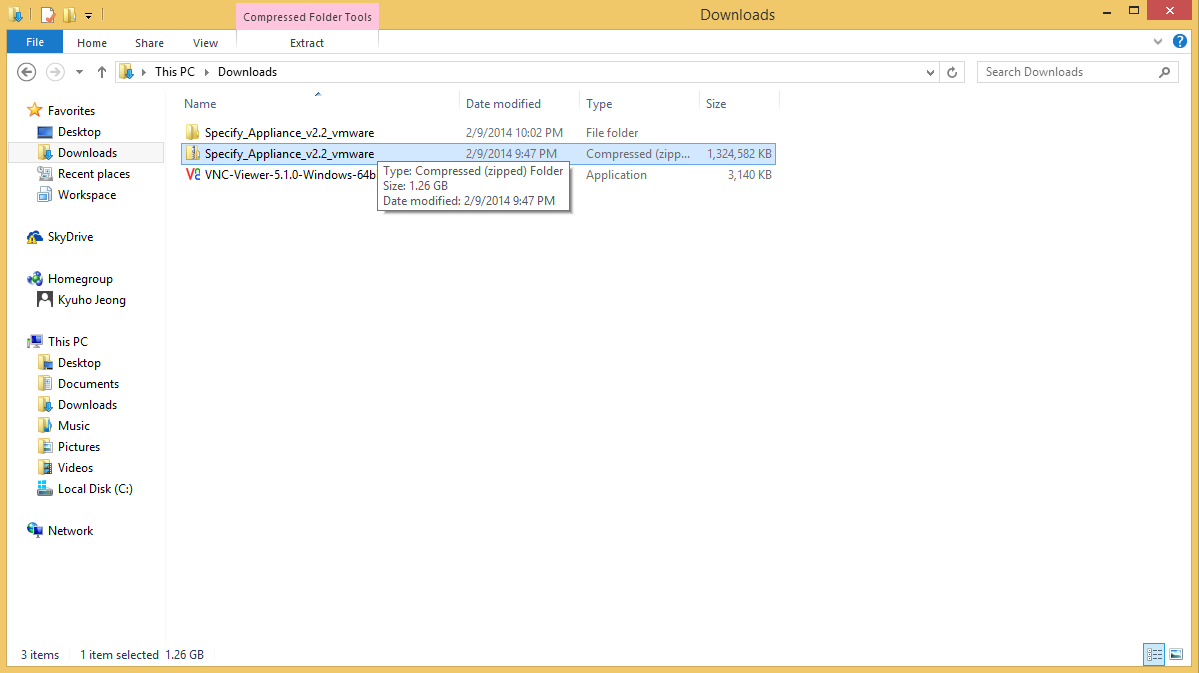
1. Extract the zip file. | |||
[[File:Specify_Appliance_00.png]] | |||
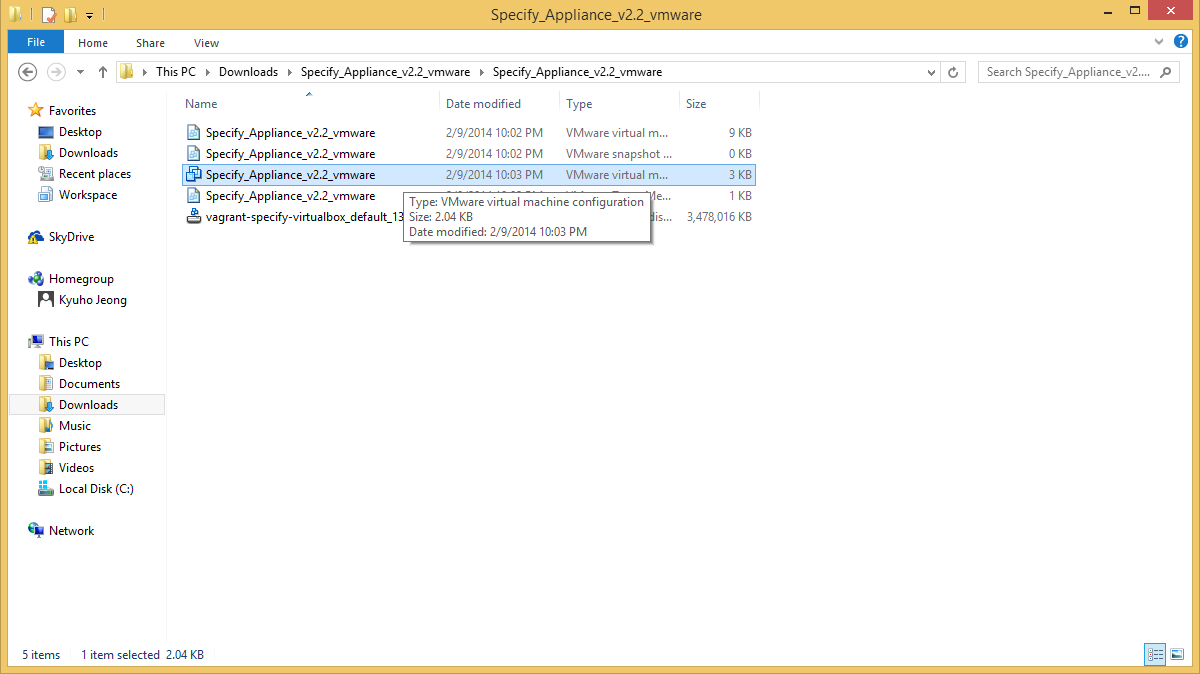
2. Enter the appliance folder and run Specify appliance by double clicking the appliance file. | |||
[[File:Specify_Appliance_01.png]] | |||
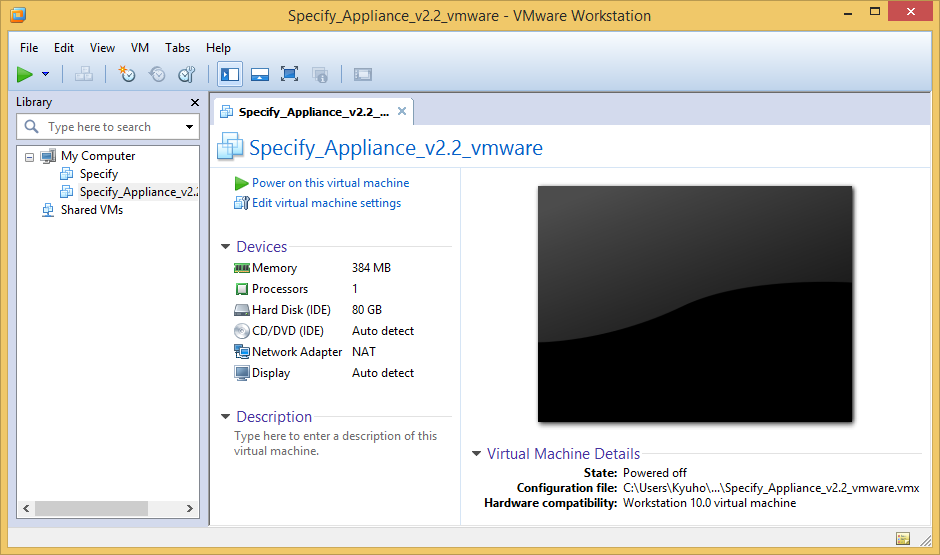
3. Click the green play button | |||
[[File:Specify_Appliance_02.png]] | |||
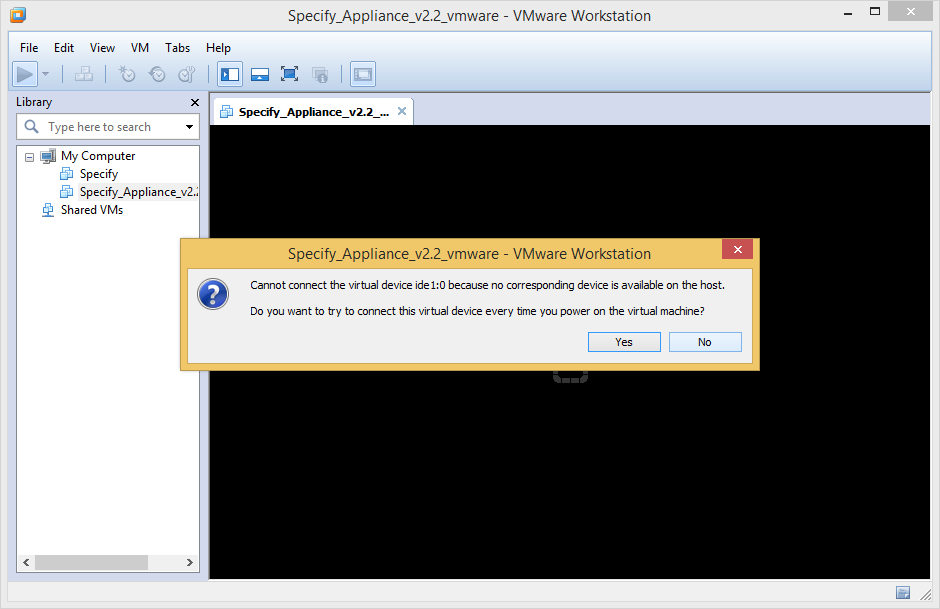
4. Some message may pop up, you can simply click "no". | |||
[[File:Specify_Appliance_03.png]] | |||
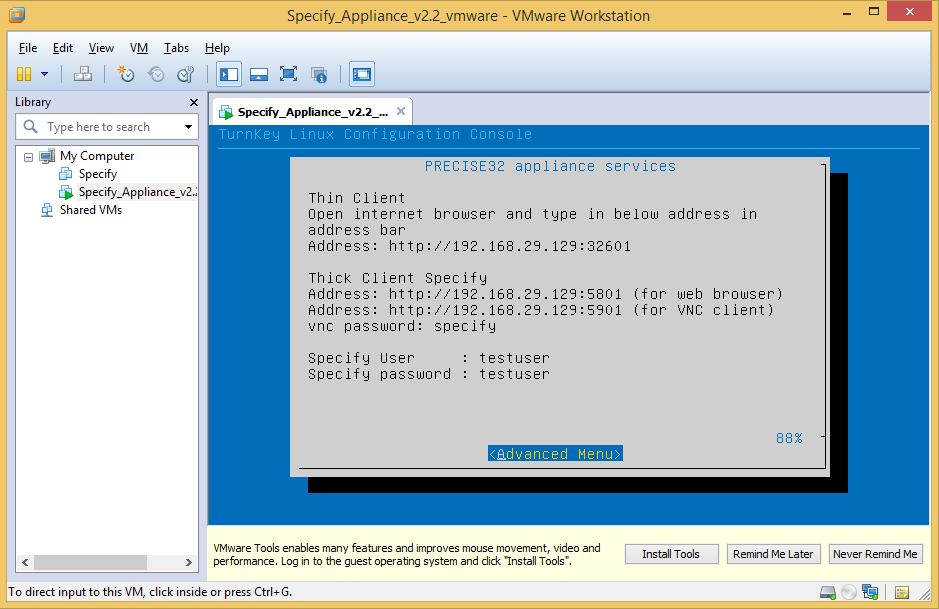
5. After the appliance boot completes, it shows several addresses. | |||
[[File:Specify_Appliance_04.png]] | |||
===Running specify thin client=== | |||
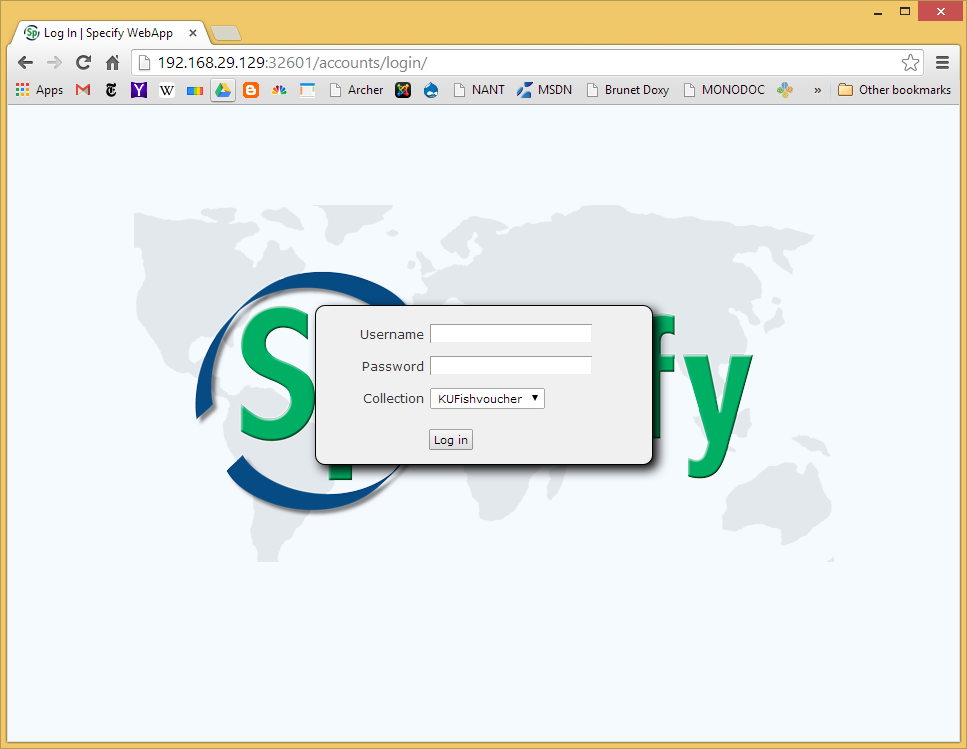
1. Type the address to the address bar in the browser. | |||
[[File:Specify_Appliance_05.png]] | |||
===Running specify thick client through web browser=== | |||
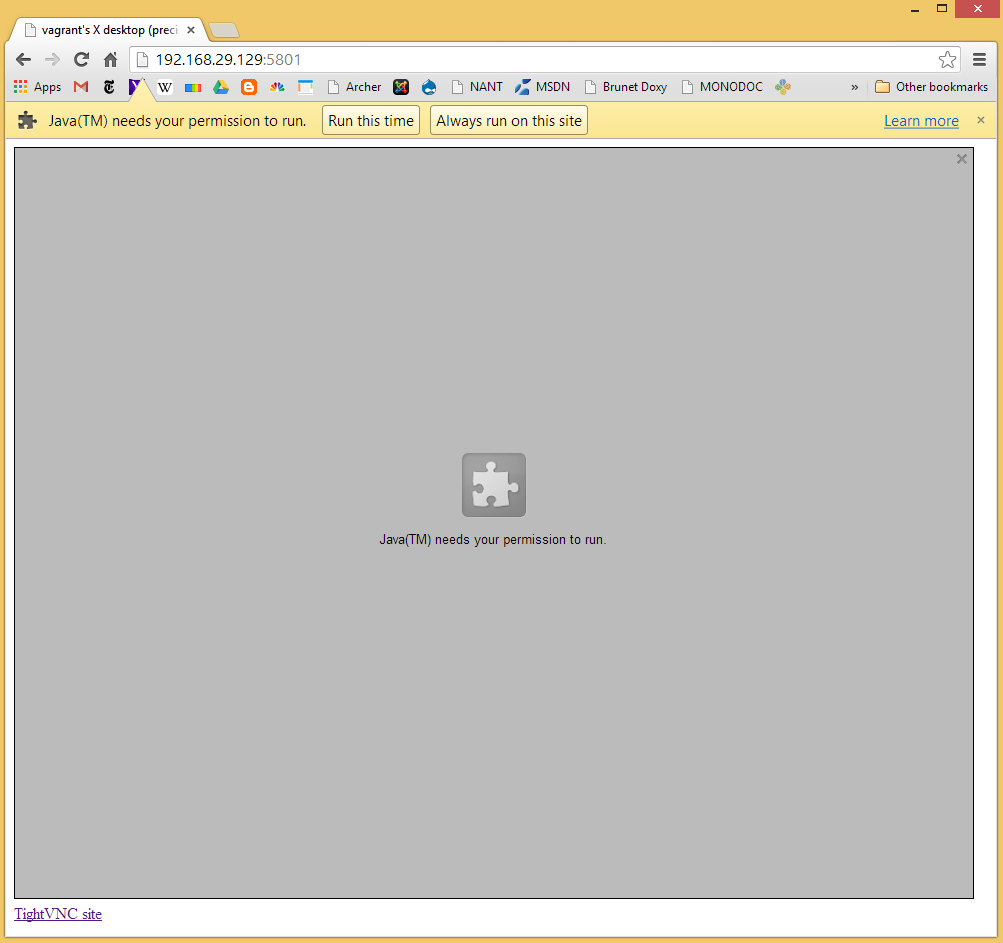
1. The browser acquire for the permission. You can click either of the permission. | |||
[[File:Specify_Appliance_06.png]] | |||
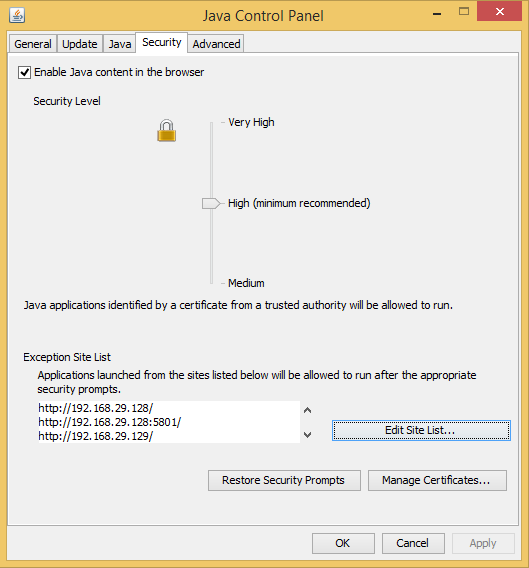
2. If a message pops up saying the security does not allow it, you need to open "Java control panel" in the control panel and add the address in the exception list. | |||
[[File:Specify_Appliance_09.png]] | |||
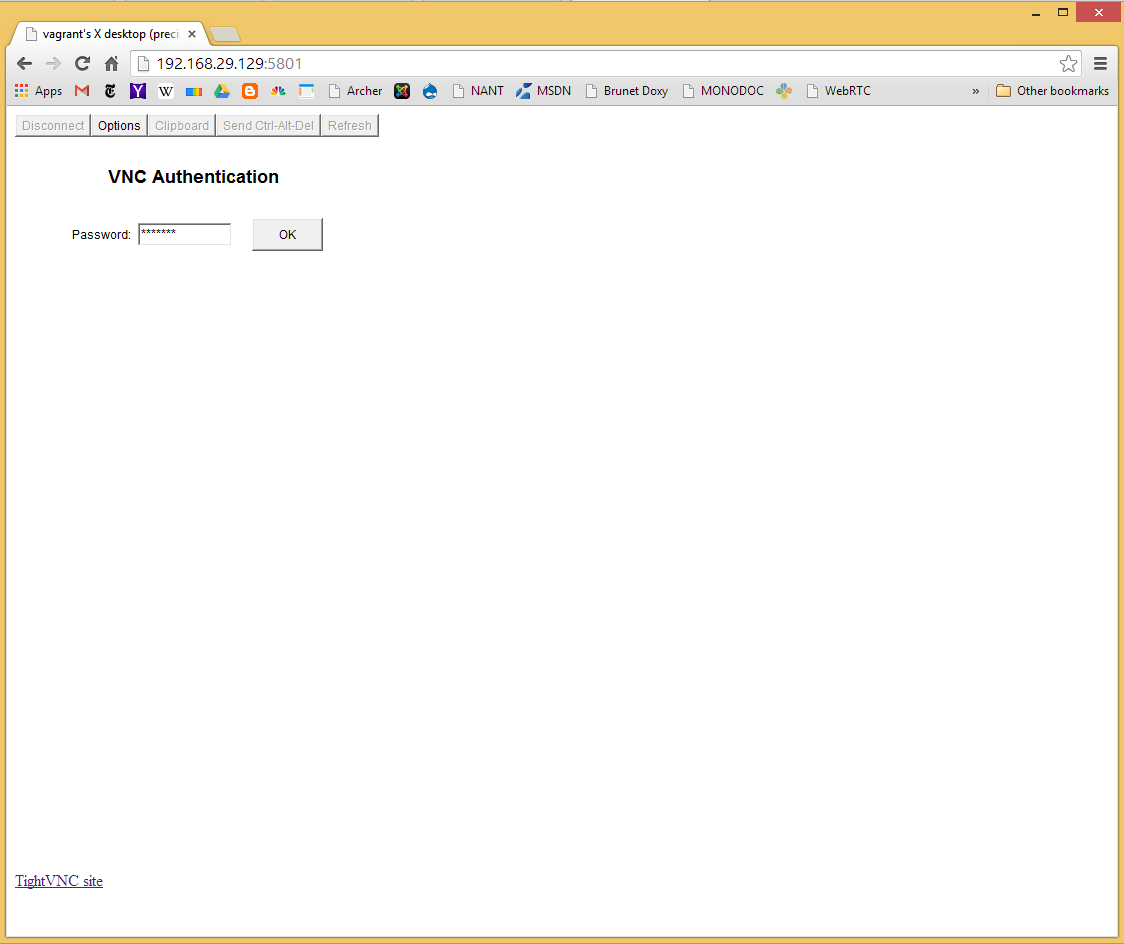
3. Enter the VNC password, the password is given in the appliance screen. | |||
[[File:Specify_Appliance_07.png]] | |||
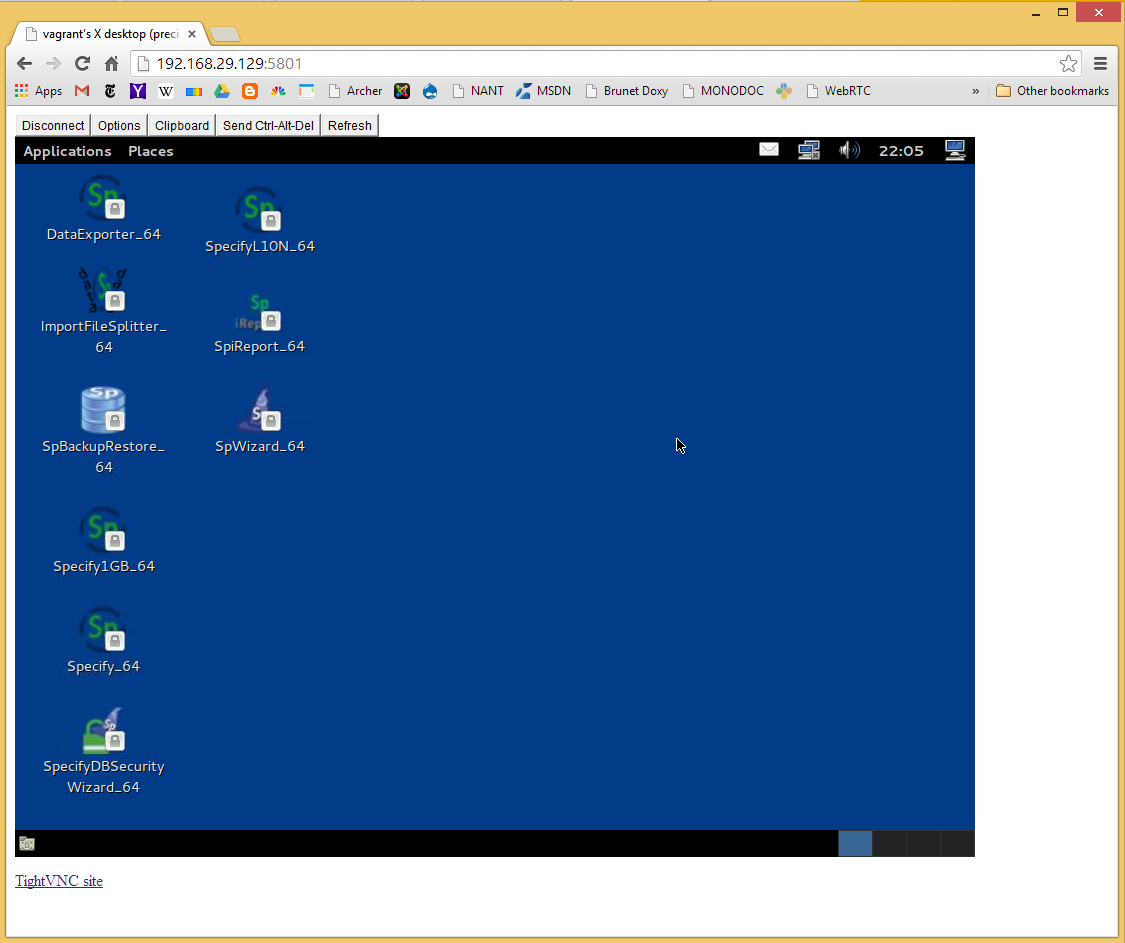
4. Now you can start Specify thick client. | |||
[[File:Specify_Appliance_08.png]] | |||
===Running specify thick client through VNC program=== | |||
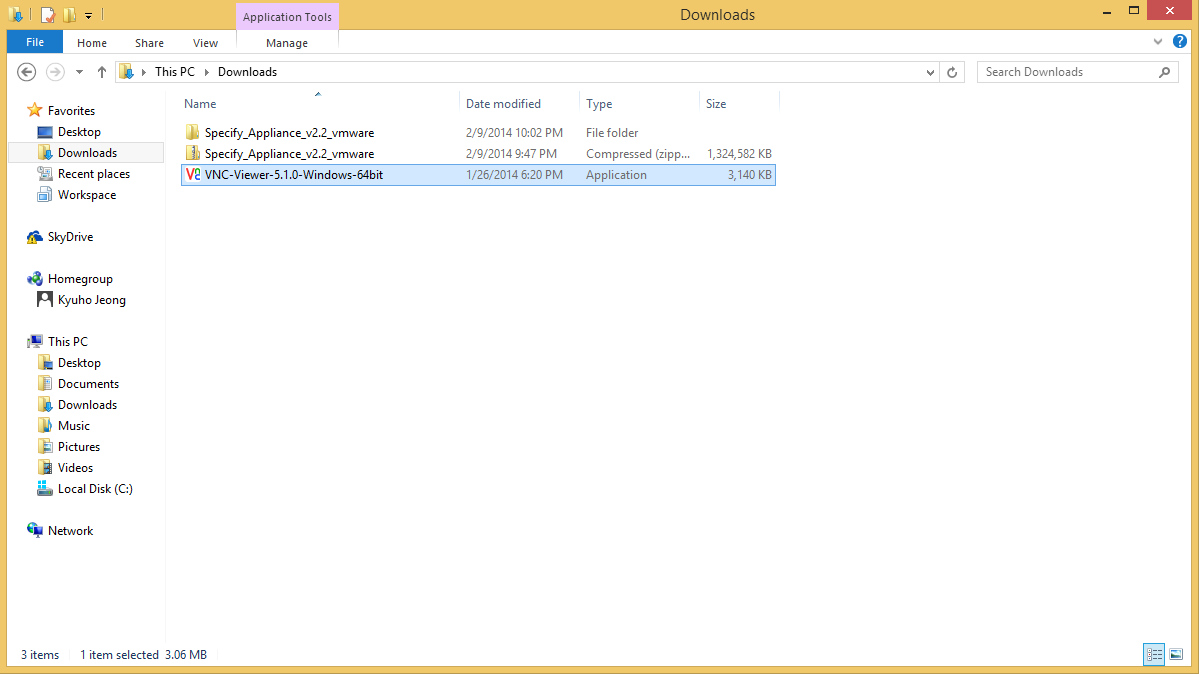
1. Download the VNC program from the below link and run it | |||
- https://www.realvnc.com/download/ | |||
[[File:Specify_Appliance_10.png]] | |||
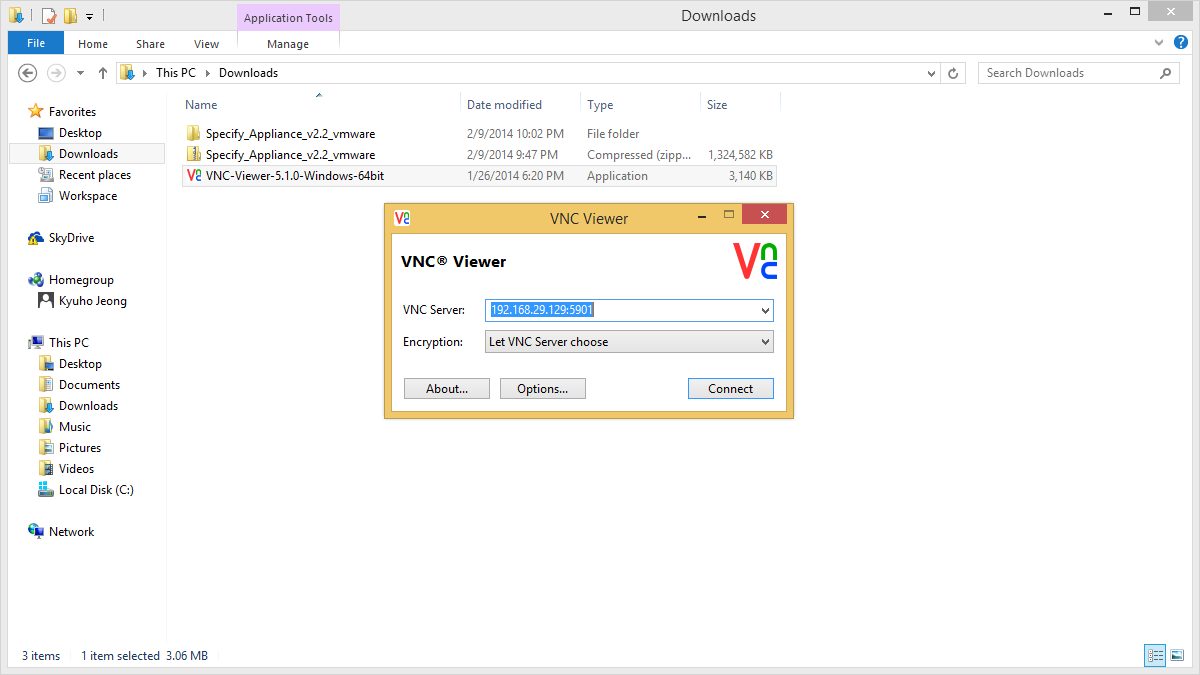
2. Enter the address and port number and connect | |||
[[File:Specify_Appliance_11.png]] | |||
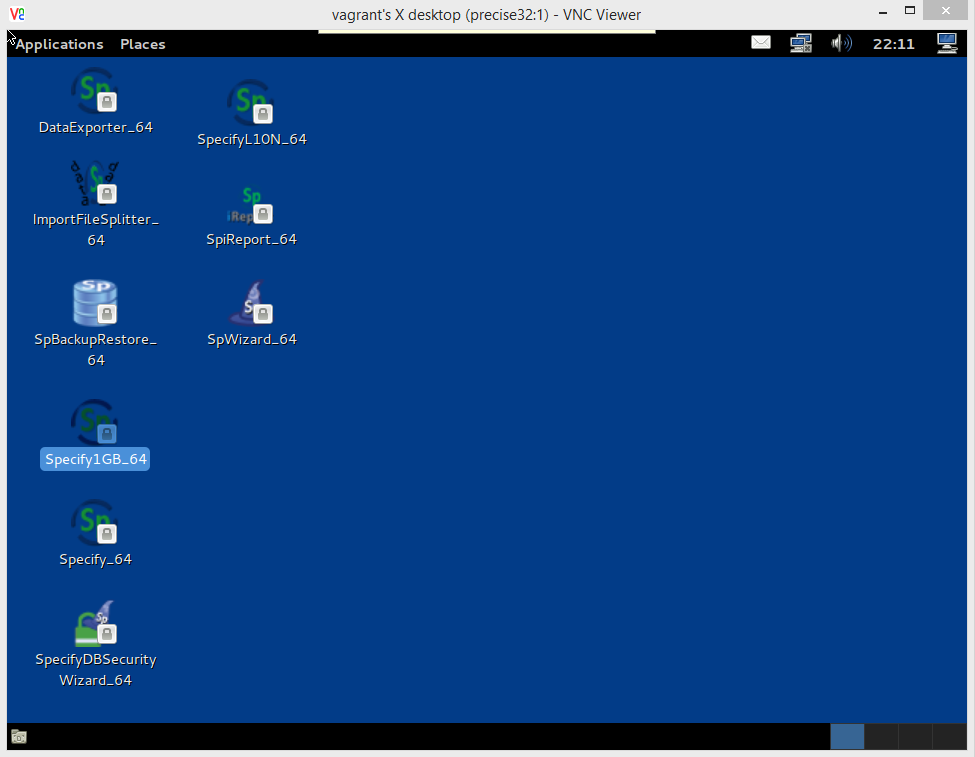
3. Double click the Specify program. The credential is given on the appliance screen. | |||
[[File:Specify_Appliance_12.png]] | |||
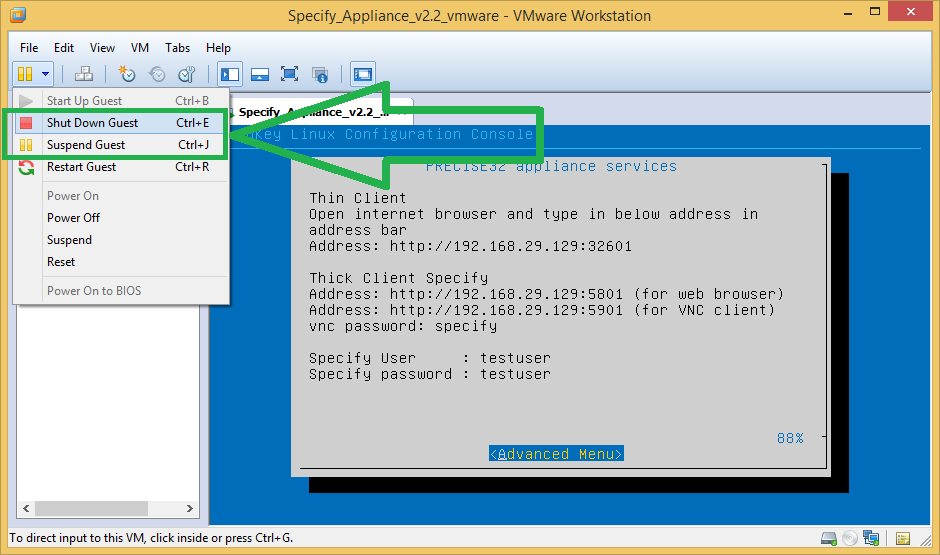
===Closing Specify Appliance=== | |||
click either "suspend" or "shutdown" button in the menu, then you can close the hypervisor by clicking x button as other software. | |||
[[File:Specify_Appliance_13.png]] | |||
Latest revision as of 17:02, 11 February 2014
Specify Appliance
Specify is a software application for managing museum specimen collection. It is a powerful application that depends on software such as database management systems, so its first-time installation and uses can take time and effort. The iDigBio Specify Appliance helps reduce this burden by packaging Specify and all its required software in the form of a pre-configured, plug-and-play virtual appliance. The Specify Appliance runs as a virtual machine in your desktop, laptop or server, using freely available virtualization software (VirtualBox, or VMware). In its typical usage, a user installs the virtualization software, downloads the virtual appliance, unpacks it, and starts it up - then, the whole Specify software is available conveniently through a Web interface and/or a remote display client (VNC). "Under the hood", the virtual appliance is running Linux, Java, Specify, a Web server (Apache), and a database server (MySQL), and more - but the user does not need to worry about configuring and running any of this software - instead, just connecting to the Specify graphical user interface. The appliance supports both the Specify thin client (Web-based, with less features) and the full-featured thick client (through remote display). The steps below guide you through the process of installing and running the Specify appliance for the first time.
Specify appliance contains below software.
Packaged software
- MySQL
- Java Runtime Environment
- Specify 6.5
- Specify Thin Client
- VNCServer
- GNOME
- Configuration Console
1. Install hypervisor
Before you run Specify appliance, you need a virtual machine player. We recommend to use VMware player if you use Windows operating system. Follow this link and download the VMware player.
- http://www.vmware.com/support/download-player
If you are Mac user and do not have a VMware fusion installed, we recommend to use VirtualBox (because it is free!). Below link introduces how to install and configuring VirtualBox on Mac.
- Installing and configuring instruction for VirtualBox(for mac)
2. Download Specify appliance
for vmware
- http://www.acis.ufl.edu/~xetron/Downloads/Specify_Appliance_v2.2_vmware.zip
for VirtualBox
- http://www.acis.ufl.edu/~xetron/Downloads/Specify_Appliance_v2.2_virtualbox.zip
3. Specify appliance usage instruction
Running specify appliance
1. Extract the zip file.
2. Enter the appliance folder and run Specify appliance by double clicking the appliance file.
3. Click the green play button
4. Some message may pop up, you can simply click "no".
5. After the appliance boot completes, it shows several addresses.
Running specify thin client
1. Type the address to the address bar in the browser.
Running specify thick client through web browser
1. The browser acquire for the permission. You can click either of the permission.
2. If a message pops up saying the security does not allow it, you need to open "Java control panel" in the control panel and add the address in the exception list.
3. Enter the VNC password, the password is given in the appliance screen.
4. Now you can start Specify thick client.
Running specify thick client through VNC program
1. Download the VNC program from the below link and run it
- https://www.realvnc.com/download/
2. Enter the address and port number and connect
3. Double click the Specify program. The credential is given on the appliance screen.
Closing Specify Appliance
click either "suspend" or "shutdown" button in the menu, then you can close the hypervisor by clicking x button as other software.
